Many women love the long-lasting shine and durability that a Shellac pedicure provides, but getting it just right can seem like a daunting task. Fear not! With this step-by-step guide, you’ll be able to achieve a flawless Shellac pedicure at home like a pro. From prepping your nails to applying the polish and curing it properly, we’ll walk you through each step to ensure your pedicure lasts for weeks without chipping or fading. Follow these expert tips and tricks to enjoy salon-quality results right in the comfort of your own home.
Key Takeaways:
- Proper preparation is imperative: Ensure the nails are clean, shaped, and free of any residue before applying Shellac polish.
- Use thin layers for a flawless finish: Apply Shellac polish in thin layers to prevent clumping and ensure a smooth, long-lasting pedicure.
- Utilize UV or LED lamp for curing: To properly cure the Shellac polish, use a UV or LED lamp for the recommended amount of time to achieve maximum durability and shine.
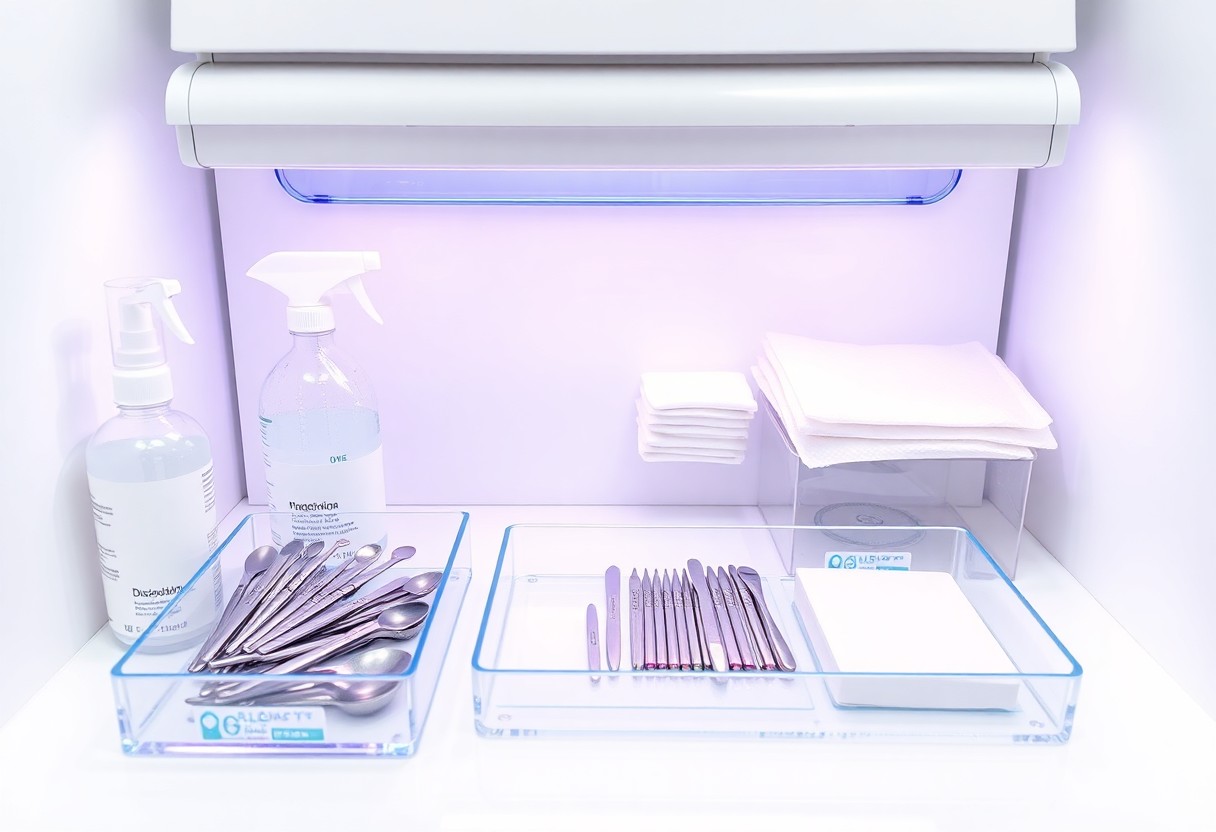
Preparing Your Nails
Cleaning and Sanitizing
Some necessary steps to ensure a flawless shellac pedicure start with cleaning and sanitizing your nails. This is a crucial step to remove any dirt, oils, or residue from your nails that could affect the longevity of your shellac. Using a gentle nail polish remover or alcohol-based cleanser, wipe down each nail thoroughly to provide a clean canvas for your pedicure.
Nail Trimming and Shaping
Clearly, nail trimming and shaping are necessary to achieve a polished look. Begin by trimming your nails to your desired length, ensuring they are all uniform. Use a nail file to shape the edges, smoothing out any roughness. Preparing your nails in this way will ensure that the shellac application looks professional and lasts longer.
Understanding the correct technique for nail trimming and shaping is crucial to avoid any accidents or damage to your nails. Always trim straight across to prevent ingrown nails and file in one direction to prevent splitting or peeling.
Applying the Shellac
Base Coat Application Tips
It is crucial to start your flawless shellac pedicure by applying a thin layer of base coat. This helps to protect your nails and create a smooth surface for the color application. Make sure to cap the free edge of the nail to seal the base coat properly.
- Use a quality base coat to ensure longevity.
- Avoid applying thick layers to prevent uneven curing.
- Allow the base coat to dry completely before moving on to the color application.
Assume that a properly applied base coat is the foundation for a long-lasting shellac pedicure.
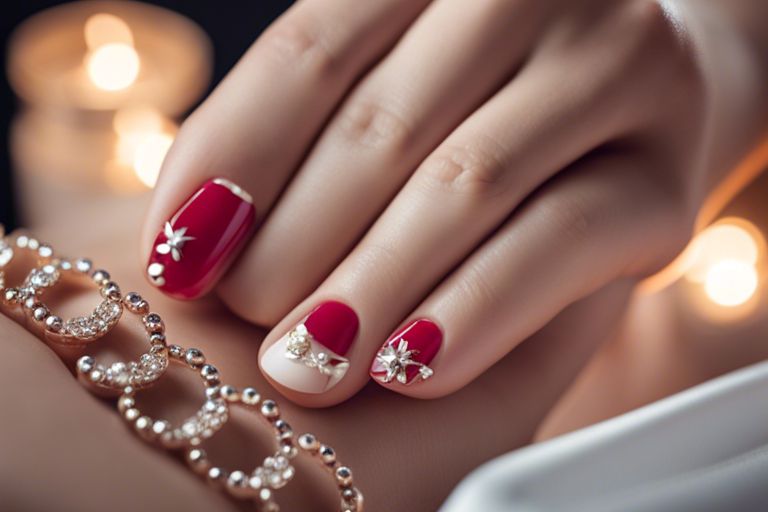
Color Coat Strategies
If you want a vibrant and even color for your shellac pedicure, pay attention to your color coat application. Choose high-quality Shellac colors and remember to apply thin, even layers to avoid streaking or pooling. Cure each layer under the UV lamp according to manufacturer’s recommendations for the best results.
Application of the color coat is an important step to achieve a professional-looking shellac pedicure.
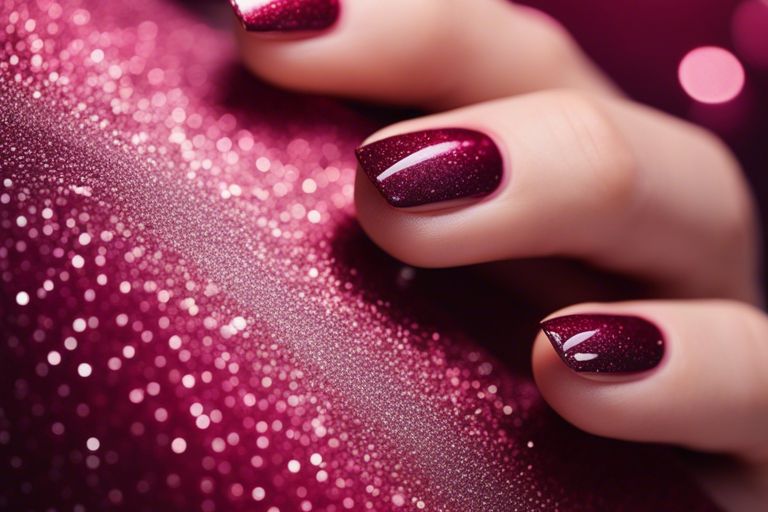
Sealing with Top Coat
Color retention and nail protection are the main benefits of sealing your shellac pedicure with a top coat. Apply a thin layer of top coat after the color has cured properly. Remember to cap the free edge of the nail to seal in the color and prevent chipping.
Sealing the color with a top coat will enhance the shine and durability of your shellac pedicure.
Curing the Shellac
Using the UV/LED Lamp Effectively
The proper use of a UV/LED lamp is imperative in achieving a flawless shellac pedicure. The curing process is what sets the shellac, ensuring a long-lasting finish. To effectively cure the shellac, follow the manufacturer’s instructions for the specific lamp being used, and always cure each layer for the recommended amount of time.
Factors Affecting Curing Time
Several factors can affect the curing time of shellac, including the thickness of each layer applied, the brand of shellac being used, and the wattage of the UV/LED lamp. It is crucial to apply thin, even layers of shellac to ensure proper curing and avoid any wrinkling or bubbling. Additionally, using a lamp with the correct wattage and following the recommended curing times will help achieve optimal results.
- Avoid applying thick layers of shellac, as this can result in uneven curing and a less durable finish.
- Ensure that the UV/LED lamp is in proper working condition and that the bulbs are not nearing the end of their lifespan, as this can affect curing time.
Curing the shellac is a crucial step in the pedicure process, as it ensures a long-lasting and durable finish. Factors such as the thickness of each layer, the brand of shellac, and the wattage of the UV/LED lamp can all impact the curing time. By following the manufacturer’s instructions and taking these factors into consideration, you can achieve a flawless shellac pedicure that lasts for weeks.
- It is important to cure each layer of shellac for the recommended amount of time to ensure proper adhesion and longevity of the pedicure.
- Thoroughly inspect each layer after curing to ensure that it has fully set and there are no areas that require additional curing time.
Maintaining Your Pedicure
Daily Care Tips
Your flawless shellac pedicure requires daily care to ensure longevity and lasting beauty. The key to maintaining your pedicure is to moisturize your feet regularly, especially focusing on the cuticles and heels. Use a hydrating foot cream to keep your skin soft and smooth. Additionally, avoid hot water and harsh chemicals that can cause your polish to chip. Remember to wear moisturizing socks overnight to lock in moisture and maintain your beautiful pedicure.
- Moisturize cuticles and heels daily
- Avoid hot water and harsh chemicals
- Use hydrating foot cream
- Wear moisturizing socks overnight
This daily care routine will help preserve the quality of your shellac pedicure and extend its lifespan.
When to Reapply
An necessary aspect of maintaining your flawless shellac pedicure is knowing when it’s time to reapply the polish. Typically, you should plan on scheduling a new pedicure every 2-3 weeks, depending on the growth of your nails and any chipping that may occur. Keep an eye on any visible signs of wear and tear, such as dullness or lifting at the edges, as these are indicators that it’s time for a refresh. Maintaining a regular reapplication schedule will ensure that your pedicure always looks fresh and vibrant.
Troubleshooting Common Issues
Tips for Avoiding Bubbles and Wrinkles
After you apply the shellac polish, ensure that you are working in thin, even layers. Thicker layers are more prone to forming bubbles and wrinkles. Be sure to cap the free edge of the nail with each coat to prevent lifting, which can also lead to these imperfections. Additionally, make sure to use fresh products and avoid shaking the polish too vigorously before application.
- Avoid applying thick layers of shellac
- Cap the free edge of the nail with each coat
- Use fresh products and avoid shaking the polish too vigorously
Perceiving bubbles and wrinkles can be frustrating, but with these tips, you can achieve a flawless shellac pedicure without any imperfections.
Fixing Chips and Lifts
Little chips and lifts can sometimes occur due to the natural wear and tear of daily activities. To prevent further damage, gently buff the affected area with a fine-grit buffer to smooth out any rough edges. Next, apply a thin layer of clear shellac polish to the chipped or lifted area, making sure to cap the free edge. Cure the polish under the UV or LED lamp as usual to seal the repair.
To ensure your shellac pedicure stays looking perfect, it’s important to address any chips or lifts promptly. By following these steps, you can easily fix and prolong the longevity of your pedicure.
Removal Process
Safe Removal Techniques
Many shellac pedicure enthusiasts often wonder about the safest methods to remove shellac polish. An important technique to remember is to never peel or chip off the polish, as this can damage the natural nail bed. Instead, opt for a gentle removal process that involves soaking the nails in acetone to dissolve the polish without causing harm.
Caring for Nails Post-Shellac
An important aspect of maintaining healthy nails post-shellac is proper care and attention. On top of ensuring the polish is removed correctly, it is crucial to nourish the nail bed with hydrating oils and creams. This helps restore any lost moisture and strengthens the nails, preventing potential brittleness and breakage.
Another effective way to care for nails post-shellac is to give them a break from any further applications of nail polish. Allowing the nails to breathe and rejuvenate after the removal process can significantly improve their overall health and appearance. Consider incorporating nail-strengthening treatments or supplements to promote nail growth and resilience.
Final Words
To wrap up, mastering a flawless Shellac pedicure involves following a systematic approach that ensures each step is executed with precision and care. By carefully preparing the nails, applying the Shellac polish correctly, and finishing with the right top coat, you can achieve long-lasting results that leave your clients satisfied. Remember to always prioritize hygiene and cleanliness throughout the process to guarantee a professional and enjoyable experience for both you and your clients. With practice and dedication, you can perfect your Shellac pedicure technique and offer top-notch services that keep clients coming back for more.
FAQ
Q: What supplies do I need for a flawless Shellac pedicure?
A: To achieve a flawless Shellac pedicure, you will need a nail file, cuticle pusher, cuticle nippers, Shellac base coat, Shellac color polish, Shellac top coat, UV or LED lamp, rubbing alcohol, and cotton pads.
Q: How do I prepare my nails for a Shellac pedicure?
A: Start by shaping and filing your nails, pushing back your cuticles, and removing any old nail polish. Then, clean your nails with rubbing alcohol to ensure they are free of any oils or residue.
Q: What is the process for applying Shellac polish to the nails?
A: Begin by applying a thin layer of Shellac base coat and curing it under a UV or LED lamp. Follow this with two thin coats of Shellac color polish, curing each layer. Finish with a layer of Shellac top coat and cure once more.
Q: How long should I cure each layer of Shellac polish?
A: Each layer of Shellac polish should be cured under a UV lamp for 2 minutes or an LED lamp for 30 seconds. This ensures the polish sets properly and lasts longer.
Q: How do I maintain my Shellac pedicure?
A: To maintain your Shellac pedicure, avoid exposing your nails to harsh chemicals and wear gloves when doing household chores. Moisturize your cuticles regularly and touch up any chips with additional Shellac polish.
Q: How do I safely remove Shellac polish from my nails?
A: To safely remove Shellac polish, soak cotton pads in acetone, place them on your nails, wrap your nails with foil, and let them sit for 10-15 minutes. Gently remove the foil and cotton pads, then use a cuticle pusher to gently push off the softened Shellac polish.
Q: How often should I get a Shellac pedicure?
A: It is recommended to get a Shellac pedicure every 2-3 weeks to maintain the appearance and durability of the polish. This timeframe allows for proper nail regrowth and prevents the polish from lifting or chipping.